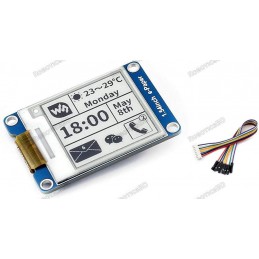
The IPS LCD 1.3″ 240×240 RGB Display ST7789 is a high-quality full-color screen designed for compact electronics projects. With its 240×240 resolution at 260 pixels per inch (PPI), it provides crisp and vibrant visuals while maintaining a wide ±80° viewing angle similar to OLED technology. Powered by the ST7789 controller, it uses an SPI interface for efficient data transfer and smooth graphics rendering. Operating at 3.3V, this module requires logic level shifting when interfaced with 5V microcontrollers like Arduino UNO to avoid damage. Its compact size and superior clarity make it suitable for user interfaces, wearables, handheld devices, smart meters, and creative robotics applications. Featured By RoboticsBD.
Product Images are shown for illustrative purposes only and may differ from the actual product.
RoboticsBD RoboticsBD RoboticsBD RoboticsBD RoboticsBD RoboticsBD RoboticsBD RoboticsBD RoboticsBD RoboticsBD
Features:
High-resolution 240×240 IPS LCD for crisp and colorful graphics.
Wide ±80° viewing angle ensures clear visibility from multiple directions.
SPI communication interface for fast and reliable data transfer.
Compact 1.3″ module ideal for space-constrained projects.
ST7789 LCD controller ensures stable performance and compatibility.
Operates at 3.3V; safe integration requires level shifters for 5V boards.
Lightweight design makes it perfect for portable and wearable devices.
RoboticsBD RoboticsBD RoboticsBD RoboticsBD RoboticsBD RoboticsBD RoboticsBD RoboticsBD RoboticsBD RoboticsBD
Applications:
DIY electronics projects with high-quality display needs.
Wearable devices and compact handheld controllers.
Robotics projects requiring status displays or GUIs.
Smart meters, IoT dashboards, and sensor readouts.
Creative visual projects such as Adafruit Uncanny Eyes with Teensy 4.1.
Portable test equipment and compact control panels.
RoboticsBD RoboticsBD RoboticsBD RoboticsBD RoboticsBD RoboticsBD RoboticsBD RoboticsBD RoboticsBD RoboticsBD
| General Specifications |
| Specification | Details |
| Display Type | IPS LCD (not OLED) |
| Screen Size | 1.3″ |
| Resolution | 240 × 240 pixels |
| Pixel Density | 260 PPI |
| Viewing Angle | ±80° |
| Controller IC | ST7789 |
| Interface | SPI (no CS pin) |
| Operating Voltage | 3.3V |
| Backlight Control | Transistor with passive components |
| Logic Compatibility | Requires level shifting for 5V MCUs |
| Recommended MCU | Teensy 4.1, ESP32, STM32, Raspberry Pi |
| Shipment Weight | 0.0171 kg |
| Shipment Dimensions | 4 × 3 × 3 cm |
Please allow 5% measuring deviation due to manual measurement.
RoboticsBD RoboticsBD RoboticsBD RoboticsBD RoboticsBD RoboticsBD RoboticsBD RoboticsBD RoboticsBD RoboticsBD
Documentation:
Module Connections
Connection to the display is via a 7-pin header.
1 x 7 Header
- GND – Connect to system ground. This ground needs to be in common with the MCU.
- VCC – Connect to 3.3V. This can come from the MCU or separate power supply.
- SCL – Connects to SPI SCL (Clock)
- SDA – Connect to SPI MOSI (Data)
- RES – Reset for the ST7789 LCD controller. Normally HIGH, pull LOW to reset
- DC – Data / Command. Determines type type of data being sent to the display. LOW = Command, HIGH = Data
- BLK – Backlight Control. If left unconnected, the backlight is always on. Pull LOW to turn off
RoboticsBD RoboticsBD RoboticsBD RoboticsBD RoboticsBD RoboticsBD RoboticsBD RoboticsBD RoboticsBD RoboticsBD
OUR EVALUATION RESULTS:
These are interesting modules to work with since they have full color and graphical capability with good library support.
These modules are breadboard friendly with a 7-pin header on the back that can be inserted into a solderless breadboard or a 7-pin female connector can be used to connect to it if the display is to be mounted. The display is mounted on a PCB which helps provide support, but be sure to press on the header pins when applying pressure to insert them into a breadboard and not press on the glass to avoid possible damage.
Though these displays can seem to be a bit intimidating to use at first, especially with a lack of a CS pin, just follow these steps to get up and running very easily.
RoboticsBD RoboticsBD RoboticsBD RoboticsBD RoboticsBD RoboticsBD RoboticsBD RoboticsBD RoboticsBD RoboticsBD
Connecting the Display
Connect VCC to 3.3V and GND to ground on the MCU.
Connect the SPI lines. In our example we are using hardware SPI as it gives the best performance. Module SCL pin goes to the SPI SCK line on the MCU and module SDA goes to the SPI MOSI line on the MCU. These pins will be different depending on which MCU your are using. The SPI SCK is pin 13 on Uno and pin 52 on Mega 2560. MOSI is pin 11 on Uno and pin 51 on Mega 2560.
Connect DC to pin 8 and RST to pin 9. The BLK pin can be left unconnected which will leave the backlight on all the time.
If you are using a 3.3V MCU, these lines can be connected directly. If you are using a 5V MCU, then be sure to use a logic level converter like shown at the bottom of the page.

RoboticsBD RoboticsBD RoboticsBD RoboticsBD RoboticsBD RoboticsBD RoboticsBD RoboticsBD RoboticsBD RoboticsBD
Install Arduino ST7789 Library
Install the Arduino-ST7789-Library. You will need to manually download it from the GitHub site as it is not available via the Arduino IDE library manager. This library is a modified version of the original Adafruit library which makes it easy to use with the displays that do not have a CS pin as well as those that do. https://github.com/ananevilya/Arduino-ST7789-Library
RoboticsBD RoboticsBD RoboticsBD RoboticsBD RoboticsBD RoboticsBD RoboticsBD RoboticsBD RoboticsBD RoboticsBD
Download and Run Program
The program below is a modified version of the example program that gets installed with the library. Mainly it was pruned down in size and the changes below already incorporated.
If you instead want to use the example program, make the following changes.
Uncomment this line: //Arduino_ST7789 tft = Arduino_ST7789(TFT_DC, TFT_RST); //for display without CS pin
Comment out this line: Arduino_ST7789 tft = Arduino_ST7789(-1, TFT_RST, TFT_MOSI, TFT_SCLK, TFT_CS); //for display with CS pin and DC via 9bit SPI
This change uses the hardware SPI lines on the MCU for fastest operation. You can also use Software SPI by uncommenting this line instead: //Arduino_ST7789 tft = Arduino_ST7789(TFT_DC, TFT_RST, TFT_MOSI, TFT_SCLK); //for display without CS pin which is slower, but allows you to use any pins you want for the SPI interface.
RoboticsBD RoboticsBD RoboticsBD RoboticsBD RoboticsBD RoboticsBD RoboticsBD RoboticsBD RoboticsBD RoboticsBD
ST7789 LCD Test Program
/***************************************************
  This is a library for the ST7789 IPS SPI display.

  Originally written by Limor Fried/Ladyada for Adafruit Industries.
  Modified by Ananev Ilia
  Further modified by Ken Hahn - ProtoSupplies.com
 ****************************************************/

#include <Adafruit_GFX.h>   // Core graphics library by Adafruit
#include <Arduino_ST7789.h> // Library for ST7789 (with or without CS pin)
#include <SPI.h>

#define TFT_DC    8     // Data/Command
#define TFT_RST   9     // ST7789 Reset
#define TFT_MOSI  11    // SPI data pin
#define TFT_SCLK  13    // SPI sclk pin

// For Hardware SPI
// Using hardware SPI pins (11, 13 on UNO; 51, 52 on MEGA; ICSP-4, ICSP-3 on DUE and etc)
Arduino_ST7789 tft = Arduino_ST7789(TFT_DC, TFT_RST); //for display without CS pin

// Using software SPI on any available pins.  Define above if changes are needed (slower)
//Arduino_ST7789 tft = Arduino_ST7789(TFT_DC, TFT_RST, TFT_MOSI, TFT_SCLK); //for display without CS pin

float p = 3.1415926;
//===============================================================================
//  Initialization
//===============================================================================
void setup() {

  tft.init(240, 240);   // initialize ST7789 chip at 240x240 pixels

  // Paint red/green/blue rectangles
  tft.fillRect(0, 0 , 240, 80, RED);
  tft.fillRect(0, 80 , 240, 160, GREEN);
  tft.fillRect(0, 160 , 240, 240, BLUE);
  delay (1000);

   // large block of text
  tft.fillScreen(BLACK);
  testdrawtext("Lorem ipsum dolor sit amet, consectetur adipiscing elit. Curabitur adipiscing ante sed nibh tincidunt feugiat. Maecenas enim massa, fringilla sed malesuada et, malesuada sit amet turpis. Sed porttitor neque ut ante pretium vitae malesuada nunc bibendum. Nullam aliquet ultrices massa eu hendrerit. Ut sed nisi lorem. In vestibulum purus a tortor imperdiet posuere. ", WHITE);
  delay(1000);

  // a single pixel
  tft.drawPixel(tft.width()/2, tft.height()/2, GREEN);
  delay(1000);

  // line draw test
  testlines(YELLOW);
  delay(1000);

  // optimized lines
  testfastlines(RED, BLUE);
  delay(1000);

  testdrawrects(GREEN);
  delay(1000);

  testfillrects(YELLOW, MAGENTA);
  delay(1000);

  tft.fillScreen(BLACK);
  testfillcircles(10, BLUE);
  testdrawcircles(10, WHITE);
  delay(1000);

  testroundrects();
  delay(1000);

  testtriangles();
  delay(1000);

  mediabuttons();
  delay(1000);
}
//===============================================================================
//  Main
//===============================================================================
void loop() {

  tft.invertDisplay(true);
  delay(500);
  tft.invertDisplay(false);
  delay(500);
}
//===============================================================================
//  Subroutines
//===============================================================================
void testlines(uint16_t color) {
  tft.fillScreen(BLACK);
  for (int16_t x=0; x < tft.width(); x+=6) {
    tft.drawLine(0, 0, x, tft.height()-1, color);
  }
  for (int16_t y=0; y < tft.height(); y+=6) {
    tft.drawLine(0, 0, tft.width()-1, y, color);
  }
}

void testdrawtext(char *text, uint16_t color) {
  tft.setCursor(0, 0);
  tft.setTextColor(color);
  tft.setTextWrap(true);
  tft.print(text);
}

void testfastlines(uint16_t color1, uint16_t color2) {
  tft.fillScreen(BLACK);
  for (int16_t y=0; y < tft.height(); y+=5) {
    tft.drawFastHLine(0, y, tft.width(), color1);
  }
  for (int16_t x=0; x < tft.width(); x+=5) {
    tft.drawFastVLine(x, 0, tft.height(), color2);
  }
}

void testdrawrects(uint16_t color) {
  tft.fillScreen(BLACK);
  for (int16_t x=0; x < tft.width(); x+=6) {
    tft.drawRect(tft.width()/2 -x/2, tft.height()/2 -x/2 , x, x, color);
  }
}

void testfillrects(uint16_t color1, uint16_t color2) {
  tft.fillScreen(BLACK);
  for (int16_t x=tft.width()-1; x > 6; x-=6) {
    tft.fillRect(tft.width()/2 -x/2, tft.height()/2 -x/2 , x, x, color1);
    tft.drawRect(tft.width()/2 -x/2, tft.height()/2 -x/2 , x, x, color2);
  }
}

void testfillcircles(uint8_t radius, uint16_t color) {
  for (int16_t x=radius; x < tft.width(); x+=radius*2) {
    for (int16_t y=radius; y < tft.height(); y+=radius*2) {
      tft.fillCircle(x, y, radius, color);
    }
  }
}

void testdrawcircles(uint8_t radius, uint16_t color) {
  for (int16_t x=0; x < tft.width()+radius; x+=radius*2) {
    for (int16_t y=0; y < tft.height()+radius; y+=radius*2) {
      tft.drawCircle(x, y, radius, color);
    }
  }
}

void testtriangles() {
  tft.fillScreen(BLACK);
  int color = 0xF800;
  int t;
  int w = tft.width()/2;
  int x