The XH-W1219 Temperature Controller Module is a versatile and user-friendly solution for temperature-based automation in both heating and cooling systems. Featuring dual digital displays, it simultaneously shows the measured temperature and the set trigger point, making configuration more intuitive compared to standard controllers. With a sensing range of -30°C to +110°C and adjustable parameters such as hysteresis, delay, correction, and high-temperature alarm, it ensures precise control and safe operation. Powered by 12VDC, the module includes a waterproof NTC thermistor probe and a relay capable of switching up to 120VAC/10A or 14VDC/10A. Ideal for use in incubators, aquariums, terrariums, greenhouses, and DIY projects, the XH-W1219 provides a compact, reliable, and flexible temperature management solution. Featured By RoboticsBD.
Product Images are shown for illustrative purposes only and may differ from the actual product.
RoboticsBD RoboticsBD RoboticsBD RoboticsBD RoboticsBD RoboticsBD RoboticsBD RoboticsBD RoboticsBD RoboticsBD
Features:
Dual 3-digit LED displays for real-time temperature and trigger point.
Wide sensor range: -30°C to +110°C with 0.1°C resolution.
Configurable for heating or cooling modes.
Adjustable parameters: hysteresis, delay, correction, min/max limits, and alarm.
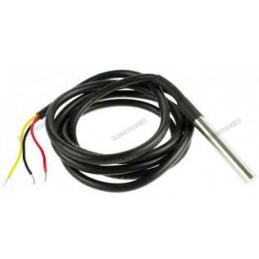
High-accuracy waterproof NTC thermistor sensor included.
Relay supports up to 120VAC @ 10A or 14VDC @ 10A loads.
Non-volatile memory stores settings even after power cycles.
Compact 12VDC-powered module for easy integration.
RoboticsBD RoboticsBD RoboticsBD RoboticsBD RoboticsBD RoboticsBD RoboticsBD RoboticsBD RoboticsBD RoboticsBD
Applications:
Incubators and aquarium heaters.
Terrariums and greenhouse temperature regulation.
Cooling fan or heater control in DIY electronics.
Home automation and smart appliance control.
Experimental and educational projects involving thermal management.
RoboticsBD RoboticsBD RoboticsBD RoboticsBD RoboticsBD RoboticsBD RoboticsBD RoboticsBD RoboticsBD RoboticsBD
| General Specifications |
| Product Type | Temperature Controller Module |
| Model | XH-W1219 |
| Power Supply | 12V DC |
| Sensor Type | Waterproof NTC 10K Thermistor |
| Measurement Range | -30°C to +110°C |
| Accuracy | ±0.1°C |
| Display | Dual 3-digit LED (temperature & trigger) |
| Relay Rating | 120VAC @ 10A / 14VDC @ 10A |
| Parameters Adjustable | Mode (Heat/Cool), Hysteresis, Delay, Correction, Alarm, Min/Max Temp |
| Memory | Non-volatile storage of settings |
| Dimensions (Module) | 6 × 4 × 2 cm |
| Shipment Weight | 0.0264 kg |
| Shipment Dimensions | 6 × 4 × 2 cm |
Please allow 5% measuring deviation due to manual measurement.
RoboticsBD RoboticsBD RoboticsBD RoboticsBD RoboticsBD RoboticsBD RoboticsBD RoboticsBD RoboticsBD RoboticsBD
Documentation:
Module Power
The module is powered from 12VDC which is connected to the screw terminal block. This can come from an AC wall adapter or similar power source.
Display
The module has two 3-digit displays composed of 0.28″ high 7-segment displays.
The top red display will always display the current temperature measurement by default. When setting parameters, it will show the parameter (P0-P6) that is being set. Once you stop pushing buttons, after about 5 seconds the display will default back to displaying the temperature.
The bottom green display will always display the current trigger temperature set point by default. When setting parameters, it will show the value that you are setting for that parameter. Once you stop pushing buttons, it will default back to displaying the trigger temperature.
If you apply power to the module without the sensor attached, it will display ‘LLL‘. If you plug in the sensor, the current temperature will be displayed which is generally in the 20-25C range.

RoboticsBD RoboticsBD RoboticsBD RoboticsBD RoboticsBD RoboticsBD RoboticsBD RoboticsBD RoboticsBD RoboticsBD
Buttons
There are 3 buttons on the module that you can fiddle with.
- SET = Momentary press sets trigger temperature. Long press enters parameter setting mode
- ‘+’ = Increment setting
- ‘-‘ = Decrement setting
RoboticsBD RoboticsBD RoboticsBD RoboticsBD RoboticsBD RoboticsBD RoboticsBD RoboticsBD RoboticsBD RoboticsBD
Setting Trigger Temperature
To set the trigger temperature which is the temperature that you want something to happen, press and release the SET button and the green display will start flashing. The default value is 28ºC
Using the +/- buttons, the value can be incremented or decremented in 0.1°C steps. Holding one of these buttons down will fast increment/decrement the value.
Pressing the SET button again saves the value that you have set and returns to the normal display. Alternatively if you stop pressing buttons rather than pressing SET, after a 5-8 second delay the value will be saved and the display will stop flashing.
RoboticsBD RoboticsBD RoboticsBD RoboticsBD RoboticsBD RoboticsBD RoboticsBD RoboticsBD RoboticsBD RoboticsBD
SETTING PARAMETERS (P0-P6 MODULE)
Please note: There are modules that have 7 parameter settings (P0-P6) which is covered here and there are modules with 5 parameter settings (P0-P4) which will be covered later.
To enter the parameter setting mode, you long press the SET button for about 3 seconds. When the button is released the top red display will show ‘P0‘ which is the first parameter setting. You may find that you need to long press the button twice before P0 is displayed. The bottom green display will show the value that you are setting. The default value will be ‘C‘ which means it is in Cooling mode.
Once in parameter setting mode, pressing the +/- keys allows you to scroll between each of the parameters that can be set.
There are 7 parameters that can be programmed into the module:
- P0 = (Heat / Cool) sets whether the relay is energized or de-energized when trigger temperature is reached.
- P1 = (Hysteresis) sets difference in degrees between the Trigger temp and when relay changes state
- P2 = (Max Temp) sets the maximum Trigger temp that can be set
- P3 = (Min Temp) sets the minimum Trigger temp that can be set
- P4 = (Temp Correction) sets an offset to use for the displayed value
- P5 = (Delay) sets a time delay between when the Trigger temp is reached and when the relay is switched
- P6 = (Alarm) sets a high temperature ‘alarm’ trip point
To reset the parameters back to factory settings, long press both the + and – buttons simultaneously
RoboticsBD RoboticsBD RoboticsBD RoboticsBD RoboticsBD RoboticsBD RoboticsBD RoboticsBD RoboticsBD RoboticsBD
P0 (Heat / Cool)
Sets whether the relay is energized or de-energized when the trigger temperature has been reached.
Long press SET to enter P0 parameter setting mode. Default value is ‘C‘.
Pressing SET again causes the value to flash and allows the value to be changed.
Use the +/- buttons to toggle between C and H.
C (default) = Cool Mode. The relay will energize when the temperature is reached. This is typically used to turn on a cooling device such as a fan.
H = Heat Mode. The relay will de-energize when the temperature is reached. This is typically used to to turn off a heating device such as a heater.
After no button pushes for 5-8 seconds, the setting is saved and the display reverts back to displaying the current temperature.

RoboticsBD RoboticsBD RoboticsBD RoboticsBD RoboticsBD RoboticsBD RoboticsBD RoboticsBD RoboticsBD RoboticsBD
P1 (Hysteresis)
Hysteresis refers to how much change in temperature must occur before the relay will change again state. For instance, if a heater is turned OFF at 30°C and the hysteresis is set to 2°C, the temperature must fall to 28°C before the relay is re-energized and the heater is turned back on.
This can be useful to avoid constantly triggering the device on and off (oscillating) right around the trigger temperature. This is how home thermostats typically work since it is hard on home heating and cooling systems to be constantly cycled on and off. On the other hand, something like an aquarium heater is fine to be operated with no hysteresis in order to hold as constant of a temperature as possible.
Long press SET to enter parameter setting mode, then +/- to reach P1. Default hysteresis setting is 2.0°C
Pressing SET again causes the value to flash and allows the value to be changed.
Press the +/- buttons to set the desired hysteresis in 0.1°C increments or 0.0 if no hysteresis is wanted.
After no button pushes for 5-8 seconds, the setting is saved and the display reverts back to displaying the current temperature.

RoboticsBD RoboticsBD RoboticsBD RoboticsBD RoboticsBD RoboticsBD RoboticsBD RoboticsBD RoboticsBD RoboticsBD
P2 (MAX Temp)
This parameter limits the maximum Trigger temperature that can be set. It can be used as a safety stop to avoid an excessively high temperature from being set by a user of the module. If you are controlling a frog terrarium heater for your kid for instance, setting this to something like 30°C may just save Kermits life if buttons might get randomly pushed.
Long press SET to enter parameter setting mode, then +/- to reach P2. Default setting is 110°C.
Pressing SET again causes the value to flash and allows the value to be changed.
Press the +/- buttons to set the desired maximum temperature setting or leave at 110°C for maximum range.
After no button pushes for 5-8 seconds, the setting is saved and the display reverts back to displaying the current temperature.

RoboticsBD RoboticsBD RoboticsBD RoboticsBD RoboticsBD RoboticsBD RoboticsBD RoboticsBD RoboticsBD RoboticsBD
P3 (MIN Temp)
This parameter limits the minimum Trigger temperature that can be set. It can be used as a safety stop to avoid an excessively low temperature from being set by a user of the module.
Long press SET to enter parameter setting mode, then +/- to reach P3. Default setting is -30°C.
Pressing SET again causes the value to flash and allows the value to be changed.
Press the +/- buttons to set the desired maximum temperature setting or leave at -30°C for maximum range.
After no button pushes for 5-8 seconds, the setting is saved and the display reverts back to displaying the current temperature.

RoboticsBD RoboticsBD RoboticsBD RoboticsBD RoboticsBD RoboticsBD RoboticsBD RoboticsBD RoboticsBD RoboticsBD
P4 (Temp Correction)
This parameter provides an offset (either positive or negative) to the displayed temperature value. This feature can be used to match the reading to another device or if you need to make a correction due to an error induced by lengthening the sensor cable.
Long press SET to enter parameter setting mode, then +/- to reach P4. The default offset is 0.0°C.
Pressing SET again causes the value to flash and allows the value to be changed.
Press the +/- buttons to set the desired offset in temperature to be used.
After no button pushes for 5-8 seconds, the setting is saved and the display reverts back to displaying the current temperature.

RoboticsBD RoboticsBD RoboticsBD RoboticsBD RoboticsBD RoboticsBD RoboticsBD RoboticsBD RoboticsBD RoboticsBD
P5 (Delay)
This parameter provides a delay between when the Trigger temperature is reached and when the relay is energized or de-energized. This setting can range from 0-10 minutes in 1 minute increments.
Long press SET to enter parameter setting mode, then +/- to reach P5. The default value is 0.
Pressing SET again causes the value to flash and allows the value to be changed.
Press the +/- buttons to set the desired delay to be used.
After no button pushes for 5-8 seconds, the setting is saved and the display reverts back to displaying the current temperature.

RoboticsBD RoboticsBD RoboticsBD RoboticsBD RoboticsBD RoboticsBD RoboticsBD RoboticsBD RoboticsBD RoboticsBD
P6 (Alarm)
This parameter provides a high temperature alarm. When the set temperature is reached, the relay is deactivated and the display shows ‘HHH‘ until the temperature goes below the alarm set-point.
Long press SET to enter parameter setting mode, then +/- to reach P6. The default is OFF.
Pressing SET again causes the value to flash and allows the value to be changed.
Press the +/- buttons to toggle the alarm ON or OFF.
If the alarm is toggled to ON, pressing the SET button again now enters the alarm temperature setting mode. Default is ‘00‘. Range is 0-110.
Press the +/- buttons to enter the desired alarm temperature.
After no button pushes for 5-8 seconds, the setting is saved and the display reverts back to displaying the current temperature.

RoboticsBD RoboticsBD RoboticsBD RoboticsBD RoboticsBD RoboticsBD RoboticsBD RoboticsBD RoboticsBD RoboticsBD
SETTING PARAMETERS (P0-P4 MODULE)
If you cycle through the parameter settings and the range is P0-P4, the functionality changes to the following:
P0 (Heat / Cool) – This functionality remains the same.
P1 (Hysteresis) – This functionality remains the same.
P2 (Temp Correction) – This functionality is the same as P4 (Temp Correction) described above
P3 (Delay) – This functionality is the same as P5 (Delay) described above.
P4 (MAX Temp) – This functionality is the same as P2 (MAX Temp) described above.
The two parameters that are not included in this version are the Alarm and Min Temp settings.
This version does not automatically save the settings and revert back to the normal operation. To save settings and revert back to normal operation, long-press the set button again.
If the thermistor cable is disconnected, instead of display “LLL”, the temperature will read the default 30.0 or the last temperature reading.
RoboticsBD RoboticsBD RoboticsBD RoboticsBD RoboticsBD RoboticsBD RoboticsBD RoboticsBD RoboticsBD RoboticsBD
MODULE CONNECTIONS
1×2 XH2.54 White Connector
The temperature sensor plugs into the white connector. It is keyed and will only go in one way though the orientation does not matter.
1 x 4 Screw Terminal Block
- GND = Ground for the module. Connect to 12VDC supply ground
- +12V= Power for the module. Connect to 12VDC.
- K1 = Relay switch contact 1
- K0 = Relay switch contact 2
The relay switch contacts are interchangeable. One side should connect to the power for the load which can either be AC or DC and the other side should connect to the load itself.
There are 4 or 5 solder pads on the left side of the module. These aren’t typically used unless you are trying to hack the module and reprogram it as shown in the link in Further Reading down below, but the power and ground may be useful in some applications.
1 x 4 Solder Pads
- ‘+’ = 5V. This is the output of the 5V regulator on the module or it can be used to power the module while programming the uC on it.
- ‘ ‘ = SWIM (Single Wire Interface Module) connects to pin 18 on the STM8 uC.
- ‘ ‘ = NRST (Reset) connects to pin 4 on the STM8 uC.
- ‘-‘ = Ground
RoboticsBD RoboticsBD RoboticsBD RoboticsBD RoboticsBD RoboticsBD RoboticsBD RoboticsBD RoboticsBD RoboticsBD
OUR EVALUATION RESULTS:
This is a very commonly used module for temperature control and for good reason. It packs a lot of functionality into a small inexpensive package and is one of our favorite modules to use.
Although we love using MCUs to monitor and control widgets using custom software as much as the next person, sometimes you just want something to get the job done and do it well and these modules fit that bill nicely.
We have tested these modules at the full rated 120VAC @ 10A as well as 12VDC @10A without any issues noted. At the full 10A, the relay does get fairly warm so keeping current under about 8A will help to ensure a good service life.
Stated accuracy is ±0.1°C which seems somewhat optimistic. Out of the box, the accuracy is closer to ±0.5°C which is still pretty good. One nice feature is the temperature correction parameter that can be used to calibrate the unit against a reference thermometer if greater accuracy is required.
RoboticsBD RoboticsBD RoboticsBD RoboticsBD RoboticsBD RoboticsBD RoboticsBD RoboticsBD RoboticsBD RoboticsBD
Package Includes:
1 x XH-W1219 Temperature Controller Module
RoboticsBD RoboticsBD RoboticsBD RoboticsBD RoboticsBD RoboticsBD RoboticsBD RoboticsBD RoboticsBD RoboticsBD
RoboticsBD RoboticsBD RoboticsBD RoboticsBD RoboticsBD RoboticsBD RoboticsBD RoboticsBD RoboticsBD RoboticsBD