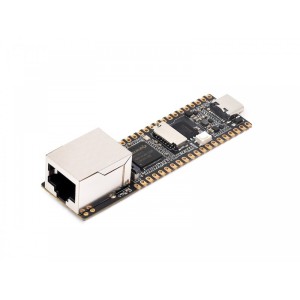
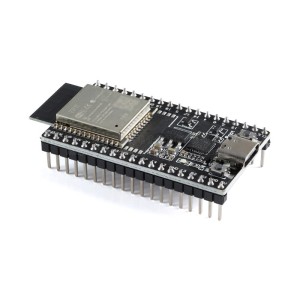
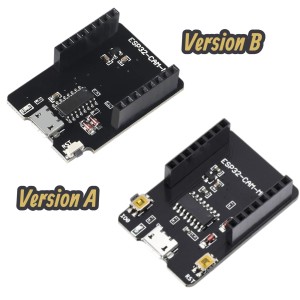
The ESP32 CAM WiFi Module Bluetooth with Camera Module 2MP For Face Recognization has a very competitive small-size camera module that can operate independently as a minimum system with a footprint of only 40 x 27 mm; a deep sleep current of up to 6mA and is widely used in various IoT applications. RoboticsBD
Product Images are shown for illustrative purposes only and may differ from the actual product.
RoboticsBD RoboticsBD RoboticsBD RoboticsBD RoboticsBD RoboticsBD RoboticsBD RoboticsBD RoboticsBD RoboticsBD
The ESP32 CAM does not come pre-assembled with the camera. You'll need to connect the camera ribbon cable to the board, a task which can be somewhat challenging. It's essential to ensure proper connection, as the camera will not function otherwise. Forceful insertion can damage both the camera and the connector. We recommend using tweezers for precision and urge you to exercise patience during this process. |
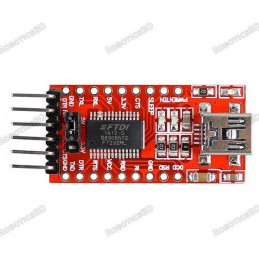
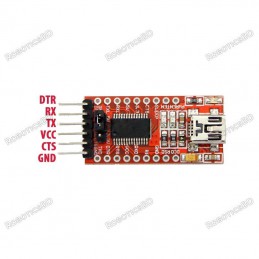
To reliably test the ESP32-CAM, you'll need a high-quality Micro-USB cable. Most cheap cables or standard phone charger cables can't handle the higher current demand of the board, especially when the camera is active. While these lower-quality cables might allow data transfer and show output on the serial terminal, they often fail to provide sufficient power for the camera, leading to errors during operation.
ESP32-CAM Setup Instructions:- 1. Do not upload any code initially—the board we’ve provided already comes with default firmware preloaded.
- 2. To test the ESP32-CAM, first connect the camera ribbon cable to the board. (Important)
- 3. Insert an SD Card. (Important)
- 4. Use an MB programmer board and power the setup with a high-quality USB cable. (Important)
- 5. Then, on your phone, scan for available Wi-Fi networks—you should see a new network named ESP32-CAM/ HW297C etc.
- 6. Connect to this Wi-Fi network, then open a browser (preferably Chrome) and go to the IP address: 192.168.4.1. Once the interface loads, scroll to the bottom of the page and click Start Streaming to begin viewing the camera feed.
It is suitable for home smart devices, industrial wireless control, wireless monitoring, and other IoT applications.
This module adopts a DIP package and can be directly inserted into the backplane to realize rapid production of products, providing customers with high-reliability connection mode, which is convenient for application in various IoT hardware terminals. RoboticsBD
ESP integrates WiFi, traditional Bluetooth, and BLE Beacon, with 2 high-performance 32-bit LX6 CPUs, 7-stage pipeline architecture. It has the main frequency adjustment range of 80MHz to 240MHz, on-chip sensor, Hall sensor, temperature sensor, etc. Featured By RoboticsBD.
Step 3: Installing the ESP32 Arduino Core
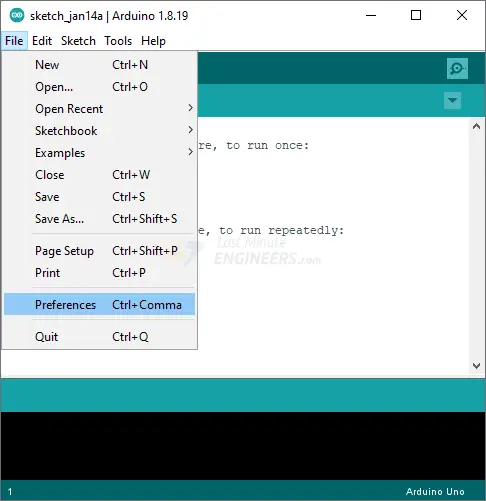
Launch the Arduino IDE and navigate to File > Preferences.
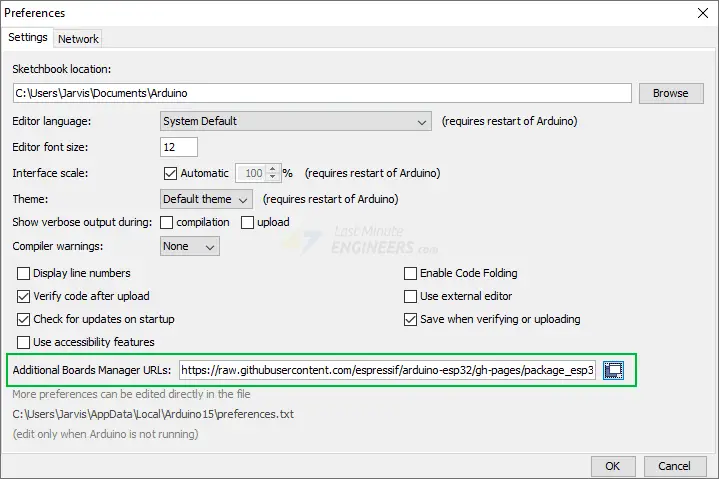
Fill in the “Additional Board Manager URLs” field with the following.
https://raw.githubusercontent.com/espressif/arduino-esp32/gh-pages/package_esp32_index.json
Then, click the “OK” button.
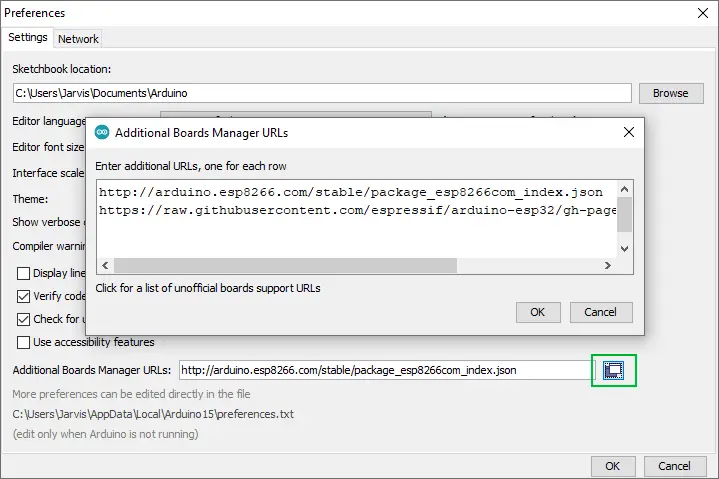
If you have already entered the URL for the ESP8266 boards or any other board, you can click on the icon to the right of the field to open a window where you can add additional URLs, one for each row.
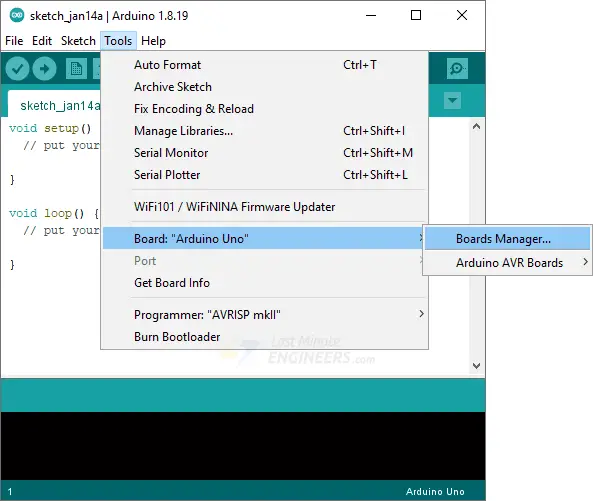
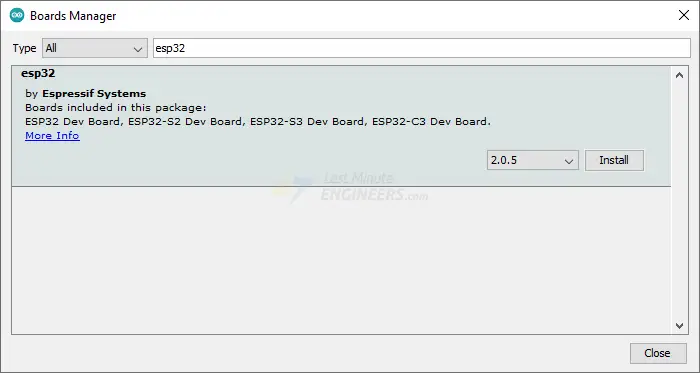
Now navigate to Tools > Board > Boards Manager…
Filter your search by entering ‘esp32‘. Look for ESP32 by Espressif Systems. Click on that entry, and then choose Install.
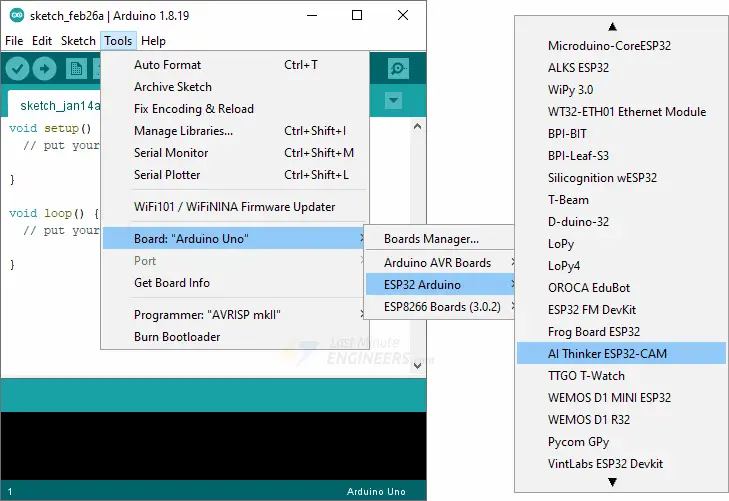
Selecting the Board and Port
After installing the ESP32 Arduino Core, restart your Arduino IDE and navigate to Tools > Board > ESP32 Arduino and select AI-Thinker ESP32-CAM.
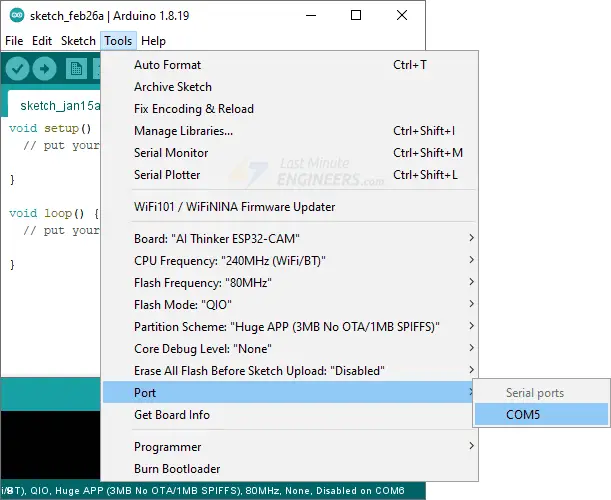
Now connect the ESP32-CAM to your computer using a USB cable. Then, navigate to Tools > Port and choose the COM port to which the ESP32-CAM is connected.
That’s it; the Arduino IDE is now set up for the ESP32-CAM!
ESP32-CAM Example 2 : Live Video Streaming Server
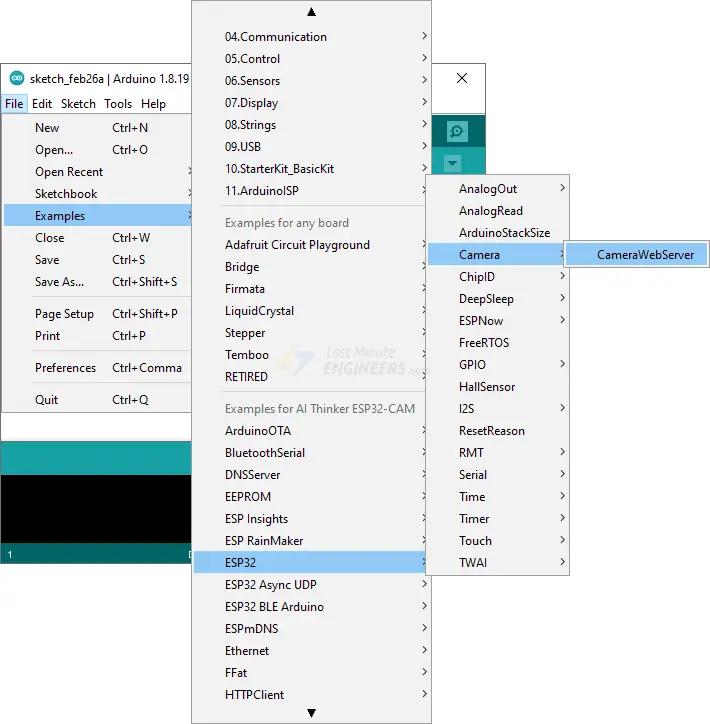
Let’s try running the CameraWebServer sketch. This sketch transforms the ESP32-CAM into a full-featured webcam, complete with features like face detection and a ton of customization options. This is a very impressive example of what the ESP32-CAM can do!
You can find this example under File > Examples > ESP32 > Camera > CameraWebServer.
We’ll need to make a few changes to get this to work with your ESP32-CAM.
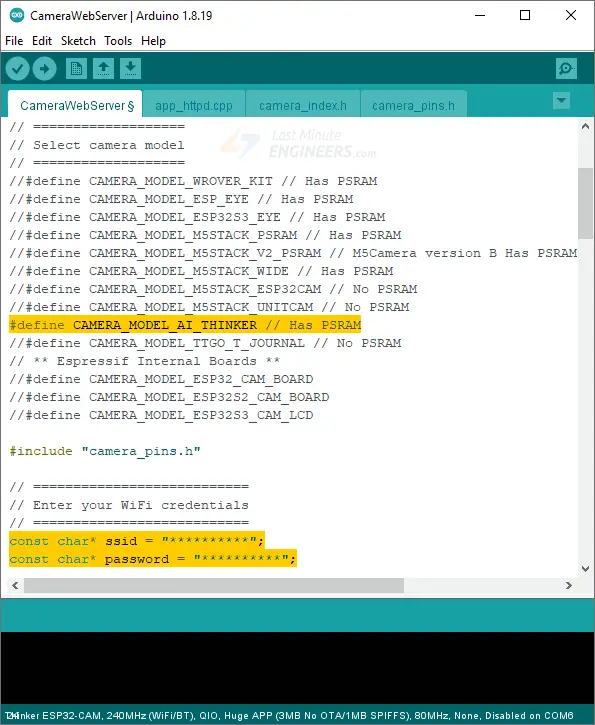
You must choose the appropriate camera model. Because we’re using the AI-THINKER model here, uncomment it and comment all the other models.
// ===================
// Select camera model
// ===================
//#define CAMERA_MODEL_WROVER_KIT // Has PSRAM
//#define CAMERA_MODEL_ESP_EYE // Has PSRAM
//#define CAMERA_MODEL_ESP32S3_EYE // Has PSRAM
//#define CAMERA_MODEL_M5STACK_PSRAM // Has PSRAM
//#define CAMERA_MODEL_M5STACK_V2_PSRAM // M5Camera version B Has PSRAM
//#define CAMERA_MODEL_M5STACK_WIDE // Has PSRAM
//#define CAMERA_MODEL_M5STACK_ESP32CAM // No PSRAM
//#define CAMERA_MODEL_M5STACK_UNITCAM // No PSRAM
#define CAMERA_MODEL_AI_THINKER // Has PSRAM
//#define CAMERA_MODEL_TTGO_T_JOURNAL // No PSRAM
// ** Espressif Internal Boards **
//#define CAMERA_MODEL_ESP32_CAM_BOARD
//#define CAMERA_MODEL_ESP32S2_CAM_BOARD
//#define CAMERA_MODEL_ESP32S3_CAM_LCD
Next, you need to tell the ESP32-CAM about your wireless network. Fill in the following variables with your network credentials:
const char* ssid = "REPLACE_WITH_YOUR_SSID";
const char* password = "REPLACE_WITH_YOUR_PASSWORD";
The code that needs to be modified is highlighted in yellow.
The code is now ready to be uploaded to the ESP32-CAM.
Accessing the Video Streaming Server
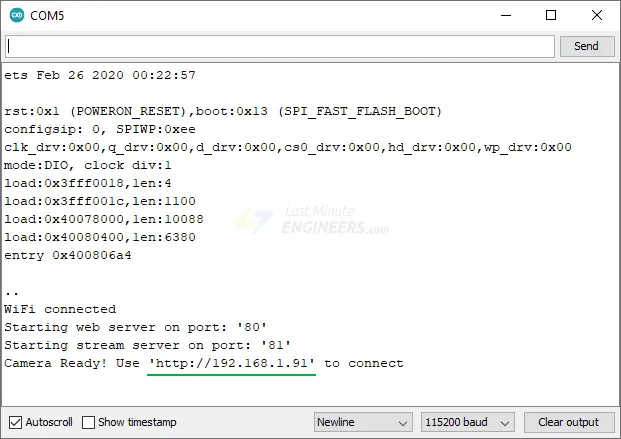
Once you have uploaded the sketch, open the serial monitor at baud rate 115200 and press the Reset button on the ESP32-CAM. You should see the IP address in the Serial Monitor.
Launch a browser and enter the IP address shown on the serial monitor. Ensure that the web browser is on the same network that the ESP32-CAM is connected to.
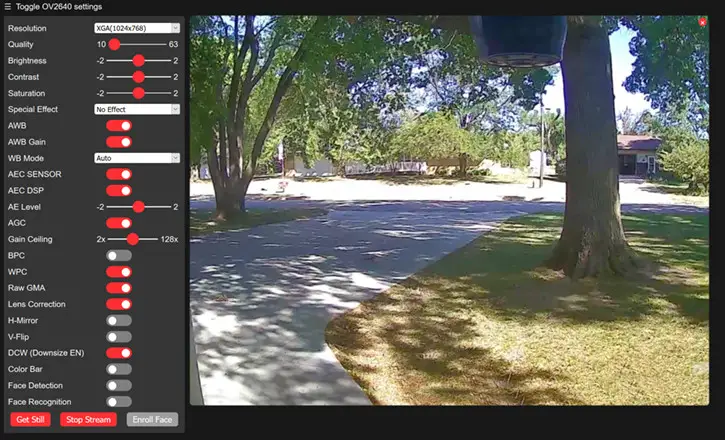
The ESP32-CAM should display a web page. To begin video streaming, press the Start Stream button.
You can play around with various camera settings in the left pane. For instance, you can alter the video’s resolution and frame rate, as well as its brightness, contrast, saturation, and the like.
Simply hit the Get Still button to take a picture. Note that images are downloaded to the computer rather than being saved to the microSD card.
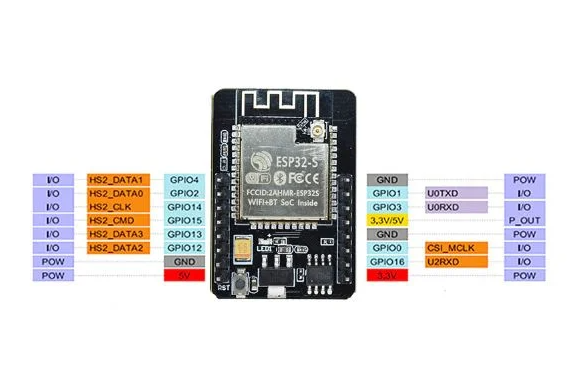
Pin Diagram:
Features :
ESP32-CAM :
- The smallest 802.11b/g/n Wi-Fi BT SoC module.
- Low power 32-bit CPU, can also serve the application processor.
- Up to 160MHz clock speed, summary computing power up to 600 DMIPS.
- Built-in 520 KB SRAM, external 4MPSRAM.
- Supports UART/SPI/I2C/PWM/ADC/DAC.
- Support OV2640 and OV7670 or OV3660 cameras, built-in flash lamp.
- Support image WiFI upload.
- Supports TF card.
- Supports multiple sleep modes.
- Embedded Lwip and FreeRTOS.
- Supports STA/AP/STA+AP operation mode.
- Support Smart Config/AirKiss technology.
- Support for serial port local and remote firmware upgrades (FOTA).
Specifications :
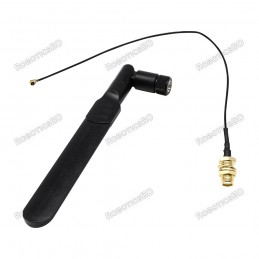
- Wireless Module: ESP32-S WiFi 802.11 b/g/n + Bluetooth 4.2 LE module with PCB antenna, u.FL connector, 32Mbit SPI flash, 4MBit PSRAM.
- External Storage: micro SD card slot up to 4GB.
- CameraExpansion: 16x through-holes with UART, SPI, I2C, PWM.
- FPC connector.
- LED flashlight.
- Misc: Reset button.
- Power Supply: 5V via pin header.
- Power Consumption.Dimensions (ESP32): 40 x 27 x 12 (LxWxH) mm.
- Flash LED off: 180mA @ 5V.
- Flash LED on to maximum brightness: 310mA @ 5V.
- Deep-sleep: 6mA @ 5V min.
- Modem-sleep: 20mA @ 5V min.
- Light-sleep: 6.7mA @ 5V min.
- Temperature Range: Operating: -20 ℃ ~ 85 ℃; storage: -40 ℃ ~ 90 ℃ @ < 90%RH.
Documentation:
- ESP32-CAM Video Streaming and Face Recognition with Arduino IDE
- Interfacing with arduino
Package Includes :
1 x ESP32 CAM WiFi Module.
RoboticsBD RoboticsBD RoboticsBD RoboticsBD RoboticsBD RoboticsBD RoboticsBD RoboticsBD RoboticsBD RoboticsBD
RoboticsBD RoboticsBD RoboticsBD RoboticsBD RoboticsBD RoboticsBD RoboticsBD RoboticsBD RoboticsBD RoboticsBD