Banner


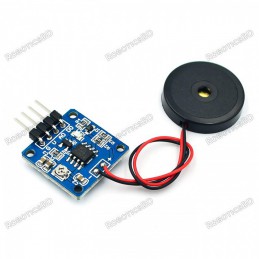
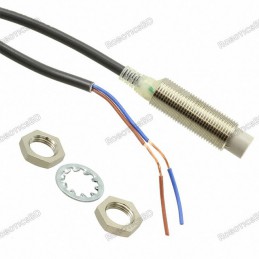
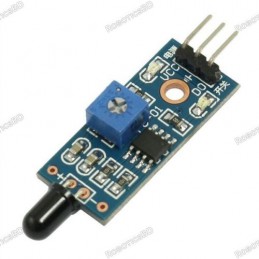
The sensor reacts to an interruption in the beam of infrared light that is transmitted between the transmitter and receiver. When the beam is interrupted by another object, the receiver signals this event by lighting up. The module is equipped with a 3 mm IR LED with an illumination angle of 10°. Beam interruption systems are used e.g. in measuring gates.
 Security policy
(edit with the Customer Reassurance module)
 Delivery policy
(edit with the Customer Reassurance module)
 Return policy
(edit with the Customer Reassurance module)
The sensorreacts to an interruptionof the beam of infrared lightthat is transmitted between thetransmitterandreceiver. When the beam is interrupted by another object, the receiver signals this event by lighting up. The module is equipped with a3 mm IR LEDwith an illumination angle of10°. Beam interruption systems are used e.g. in measuring gates.
Wiring these sensors for Arduino use is really easy.
First up you'll need to power the transmitter. Connect the black wire to ground and the red wire directly to 3.3V or 5V power. It will draw 9mA from 3.3V (lower power) and 20mA from 5V (better range)
Next up you'll want to connect up the receiver. Connect the black wire to ground, the red wire to 3.3V or 5V (whichever logic level you like) and then the white or yellow wire to your digital input.
Note that you do not have to share power supply ground or power between the two, the 'signal' is sent optically.
The receiver is open collector which means that you do need a pull up resistor. Most microcontrollers have the ability to turn on a built in pull up resistor. If you do not, connect a 10K resistor between the white wire of the receiver and the red wire.
On an Arduino, we'll connect the signal (yellow/white) pin to Digital #4

Run this demo code on your Arduino
/*
  IR Breakbeam sensor demo!
*/

#define LEDPIN 13
  // Pin 13: Arduino has an LED connected on pin 13
  // Pin 11: Teensy 2.0 has the LED on pin 11
  // Pin  6: Teensy++ 2.0 has the LED on pin 6
  // Pin 13: Teensy 3.0 has the LED on pin 13

#define SENSORPIN 4

// variables will change:
int sensorState = 0, lastState=0;         // variable for reading the pushbutton status

void setup() {
  // initialize the LED pin as an output:
  pinMode(LEDPIN, OUTPUT);
  // initialize the sensor pin as an input:
  pinMode(SENSORPIN, INPUT);
  digitalWrite(SENSORPIN, HIGH); // turn on the pullup

  Serial.begin(9600);
}

void loop(){
  // read the state of the pushbutton value:
  sensorState = digitalRead(SENSORPIN);

  // check if the sensor beam is broken
  // if it is, the sensorState is LOW:
  if (sensorState == LOW) {
    // turn LED on:
    digitalWrite(LEDPIN, HIGH);
  }
  else {
    // turn LED off:
    digitalWrite(LEDPIN, LOW);
  }

  if (sensorState && !lastState) {
    Serial.println("Unbroken");
  }
  if (!sensorState && lastState) {
    Serial.println("Broken");
  }
  lastState = sensorState;
}
With the above wiring, when you put you hand between the sensor pair, the onboard LED will turn on and the serial console will print out messages:

Specific References
Your review appreciation cannot be sent
Report comment
Report sent
Your report cannot be sent
Write your review
Review sent
Your review cannot be sent
Reference: RBD-1951
Reference: RBD-2080
Reference: RBD-0272
Brand: Waveshare
Reference: RBD-1192
Reference: RBD-0678
Reference: RBD-2229
Reference: RBD-0492
Reference: RBD-2088
Reference: RBD-1716
Reference: RBD-2342
Reference: RBD-0429
Reference: RBD-2231
Reference: RBD-0700
Reference: RBD-0149
Reference: RBD-2100
Reference: RBD-0687
The sensor reacts to an interruption in the beam of infrared light that is transmitted between the transmitter and receiver. When the beam is interrupted by another object, the receiver signals this event by lighting up. The module is equipped with a 3 mm IR LED with an illumination angle of 10°. Beam interruption systems are used e.g. in measuring gates.
check_circle
check_circle